Adding your own choice of fonts is relatively easy by using Custom CSS function on the G5Theme item. All that’s required is uploading a font to your server, then adding it to your theme with a few small snippets of CSS.
Let’s look at how to do it for your WordPress theme as well as a G5Theme item.
Step 1: Prepare all your font files
There are many places to find great web fonts for free, just make sure the font you choose has a license suitable for your needs.
Once you have chosen your new font, you need to download its file. Keep in mind that there are different kinds of font files and they aren’t all compatible across most major browsers (ex: my theme used eot, woff2, woff, ttf, svg)
Step 2: Upload font files to your directory
Once you’ve prepared all your font, it’s a good idea to back up your entire site before making any changes.
Unzip the font packaged file and upload the contents to your theme folder which can be found under this path wp-content\themes\your-theme\assets\fonts (“Fonts” folder to house your file to keep things organized, especially if you plan on adding more than one font)
Step 3: Add Custom CSS
Go to Theme Options >> Custom CSS tab on the backend, add CSS below:
@font-face {
font-family: 'your_name_font_family';
src: url('https://your_domain/wp-content/themes/[your_theme]/assets/fonts/your_font_file_name.eot');
src: url('https://your_domain/wp-content/themes/[your_theme]/assets/fonts/your_font_file_name.eot?#iefix') format('embedded-opentype'),
url('https://your_domain/wp-content/themes/[your_theme]/assets/fonts/your_font_file_name.woff2') format('woff2'),
url('https://your_domain/wp-content/themes/[your_theme]/assets/fonts/your_font_file_name.woff') format('woff'),
url('https://your_domain/wp-content/themes/[your_theme]/assets/fonts/your_font_file_name.ttf') format('truetype'),
url('https://your_domain/wp-content/themes/[your_theme]/assets/fonts/your_font_file_name.svg#ge_ss_twolight') format('svg');
font-weight: normal;
font-style: normal;
}
– your_name_font_family: name of the font, you can type anything you want (make sure that it don’t duplicate already fonts)
– your_domain: your website URL
– your_font_file_name: they are the name of files (which you uploaded to directory font).
Step 4: Save changes
Click “Save Changes” and “Generate Less To CSS”
or click “Save & Generate CSS” button. Recently, we integrated “Save Changes” and “Generate Less To CSS” button (http://prntscr.com/gb0920) so you can simply click on “Save Changes” button.
After that, you can use style: font-family: 'your_name_font_family';anywhere on your website.
How to add a new font to Theme Options in Real Estate Themes
These screenshots below are captured in the Benaa theme – one of the real estate WordPress themes developed by G5Theme.
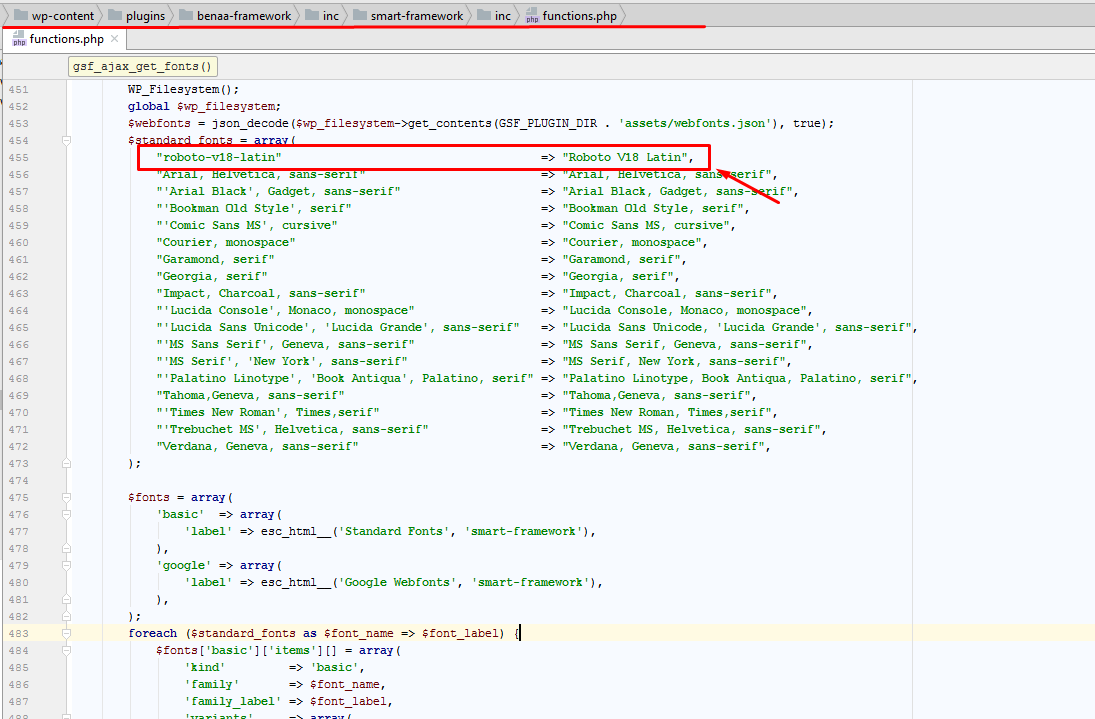
Step 1: Prepare all your font files and declare the new font to the functions.php file
Download the package of the font you have chosen, then log in your FTP account to declare the new font to the functions.php file which located in this path: wp-content/plugins/benaa-framework/inc/smart-framework/inc/funtions.php

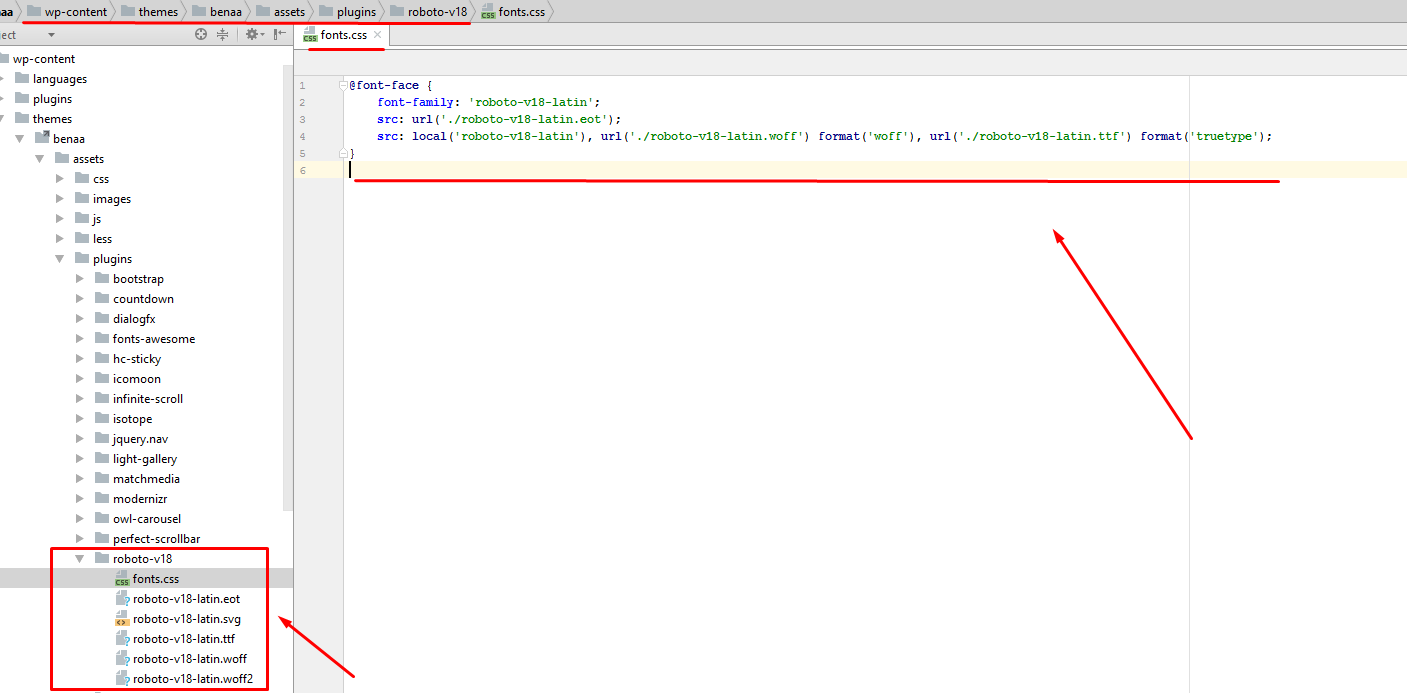
Step 2: Upload all the font files and create a new CSS file for the font
Unzip the font packaged file then go to this path: wp-content/themes/benaa/assets/plugins/ and upload the folder that included all the font files.
Create a new CSS file named fonts.css which declare the font files as below:

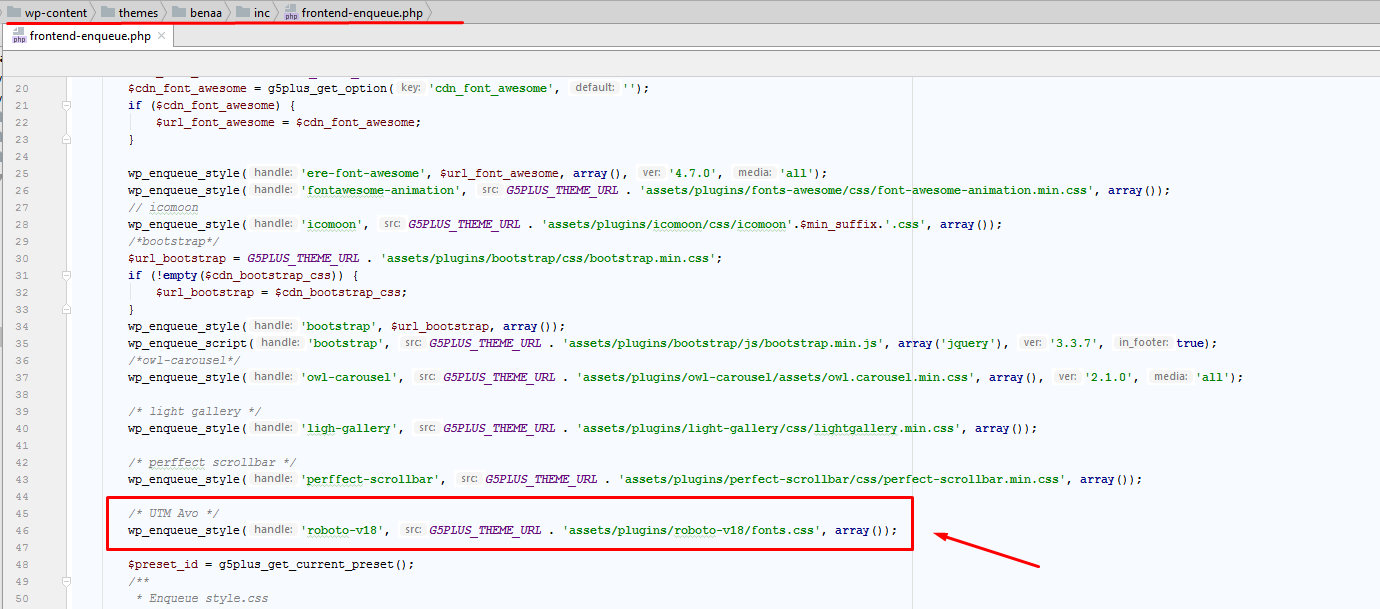
Step 3: Declare the font to the frontend-enqueue.php
Declare the font to the frontend-enqueue.php file which can be found under this path: wp-content/themes/benaa/inc

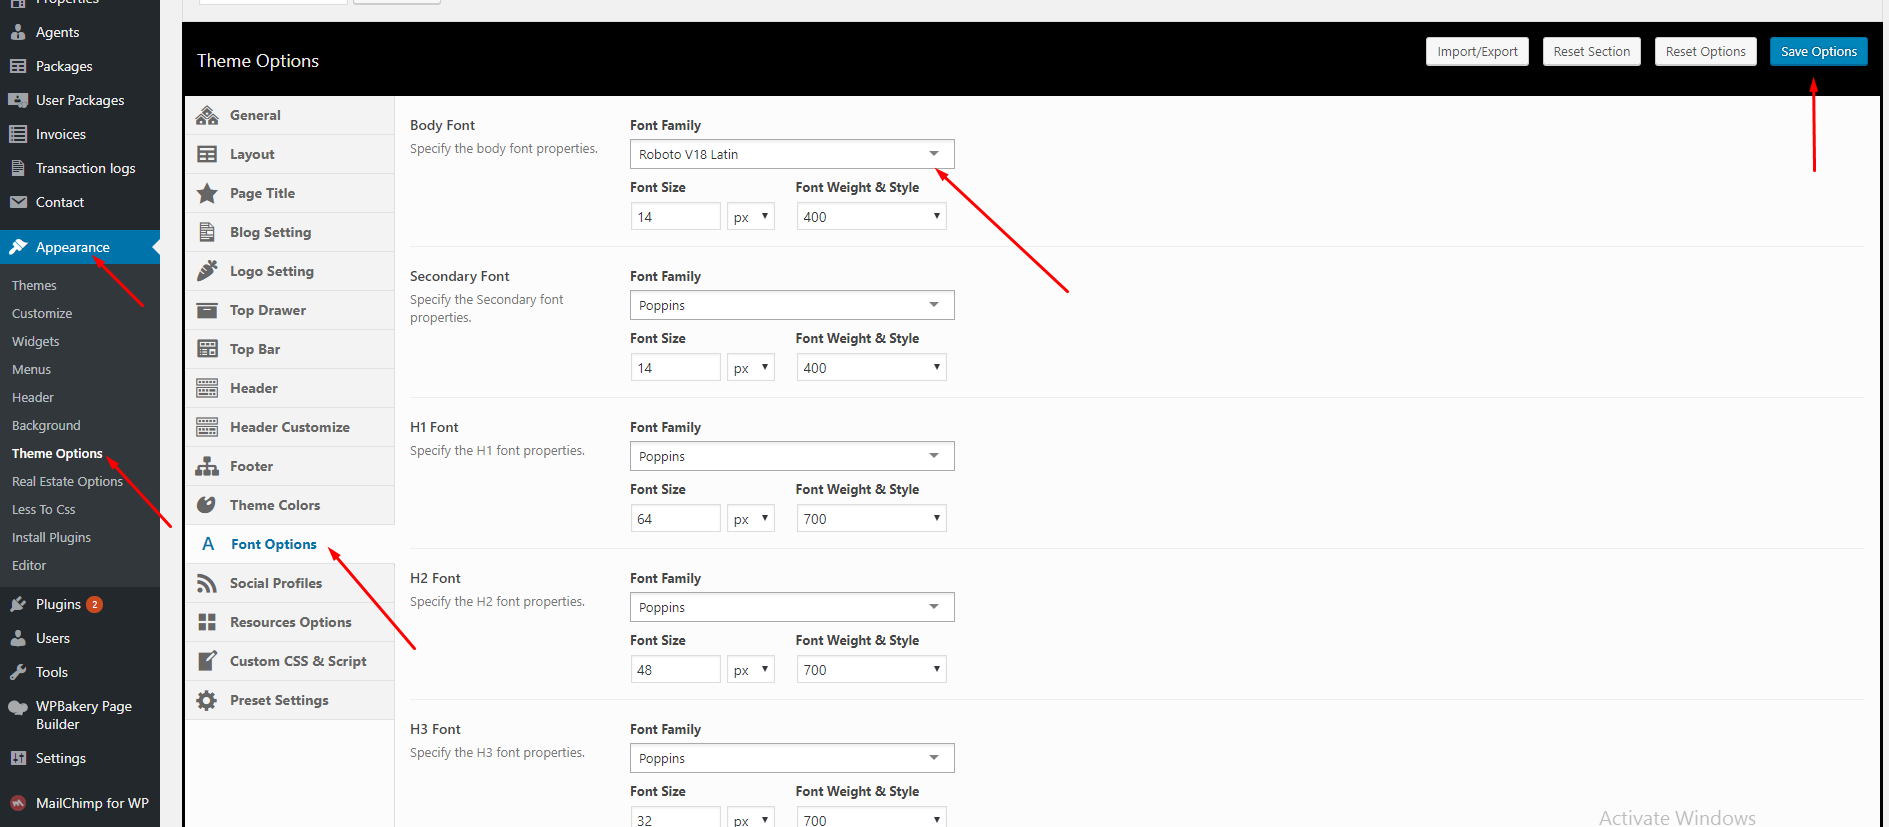
Step 4: Use the new font in Theme Options
Go to Theme Options -> Font Options to choose the new font from Font Family

——————-
If you have any troubles configuring your website applications with the above settings you can contact the G5Plus Support team by signing up and submit a new topic. We will be glad to assist you.
Thank you very much for choosing G5Theme.