NOTE: This article apply for Academia theme. To show all the download items in the Downloads on my-account page do follow step by step to show all the download items.
1. Check woocommerce version, if version lower 2.6.1 won’t have Downloads page, need update to 2.6.1 or higher.
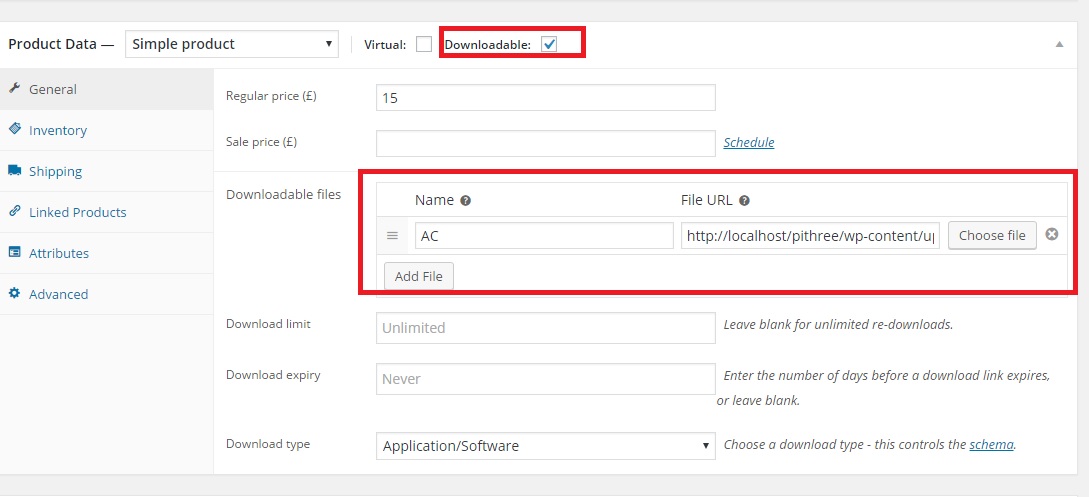
2. Setting product to downloadable
3. Grant access for downloadable products
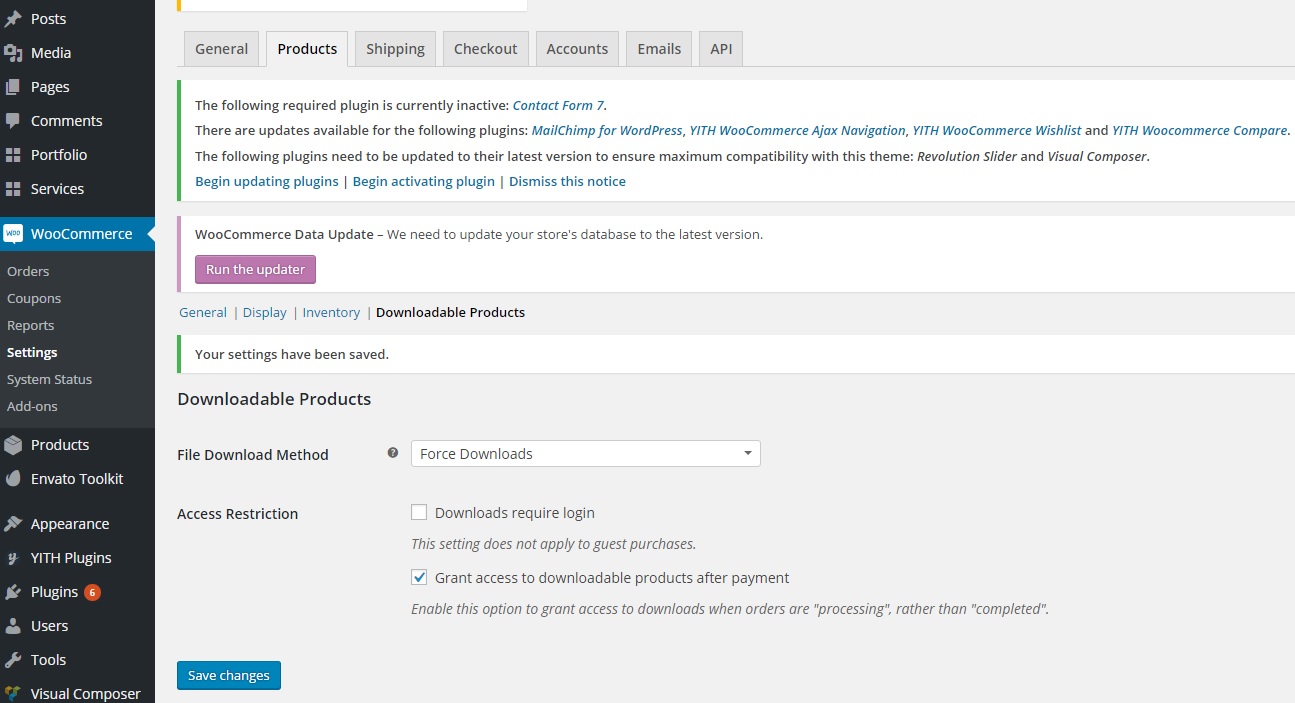
3.1 Automatically:
You need settings “Grant access to downloadable products after payment” as image:
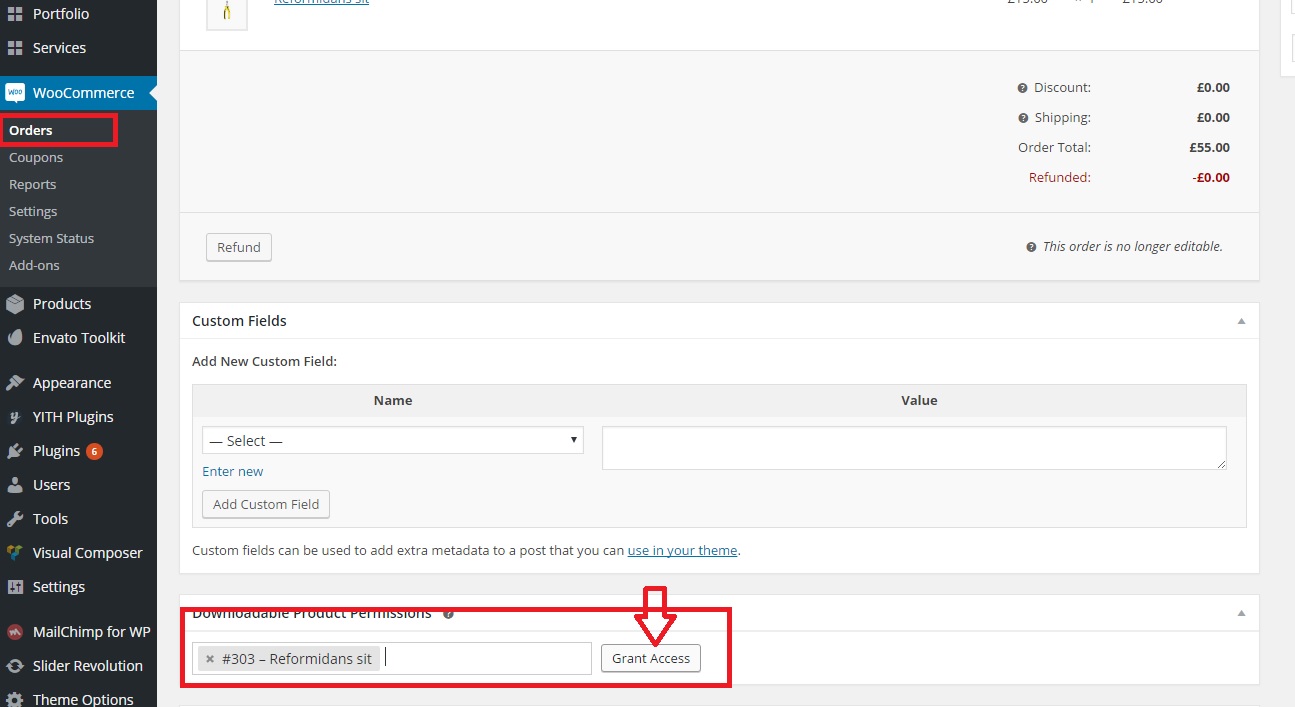
3.2 Manual:
You need un-check step 3.1, then after customers have payment order, go to order and grant access
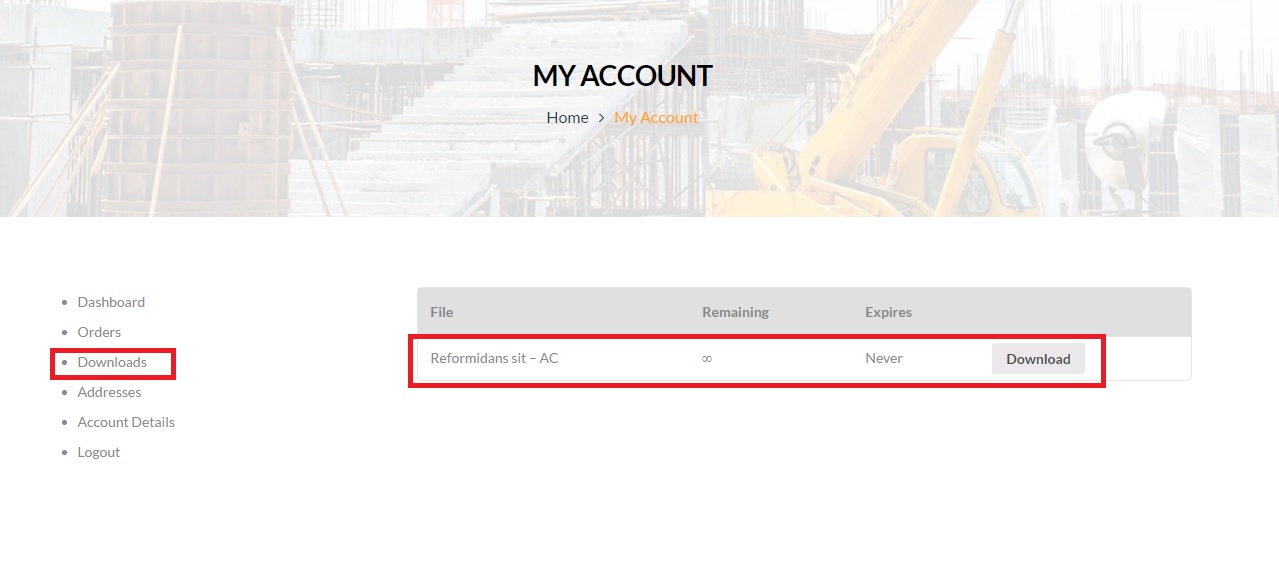
After done all steps above, go to my-account page -> tab Download will see products display look like That’s all. Thanks for your watching.
If you’re still having trouble upgrading your theme after reading this post, let us help! G5Theme awesome support team can help you with any issue, so please create topic or send us an email to g5plus@outlook.com
G5Theme.
Your website may be slow because of many reasons:
– Internet Speed
– Server/hosting CPU/RAM
– Number request at the same time(when you access)
– Use CDN or not?
– Use plugin cache?
– Use server cache? etc
Type your website URL and click on Analyze button to know your website speed.
This article will offer you our advice so that you can enhance your website’s performance. We will show our guideline for configuration WP Rocket (http://wp-rocket.me/) plugins and Cloudflare(https://www.cloudflare.com) with the free package. Both of them are used on all my theme. Now, let’s get started.
1. Config for WP Rocket, do follow:
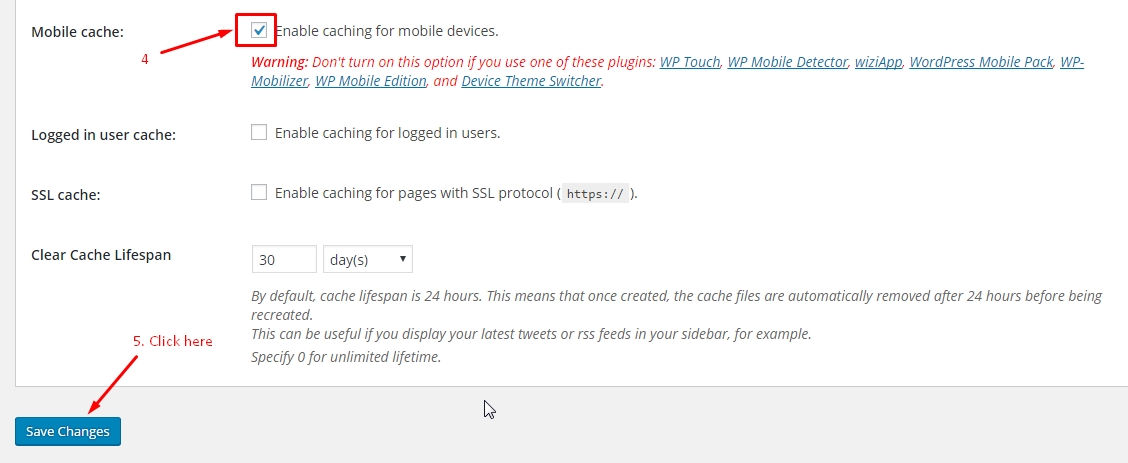
1.1 Config tab “Basic Options”
Next to:
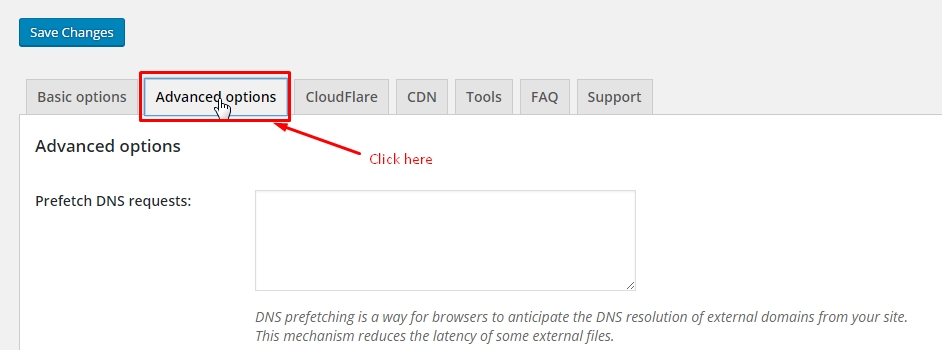
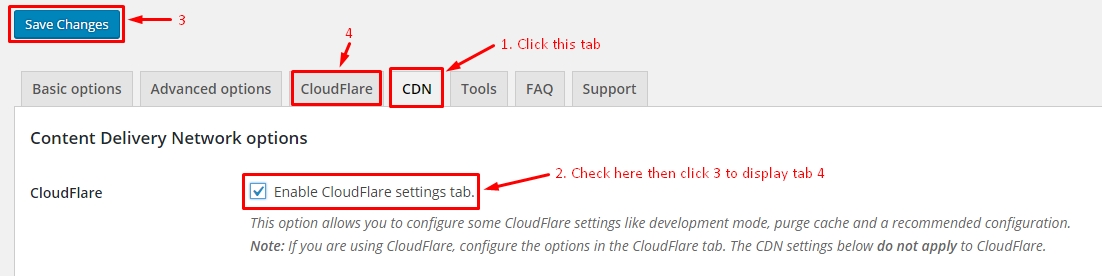
1.2. Config “Advanced Options”
Then scroll down to check the checkboxes as the image below. Then click “Save Changes”
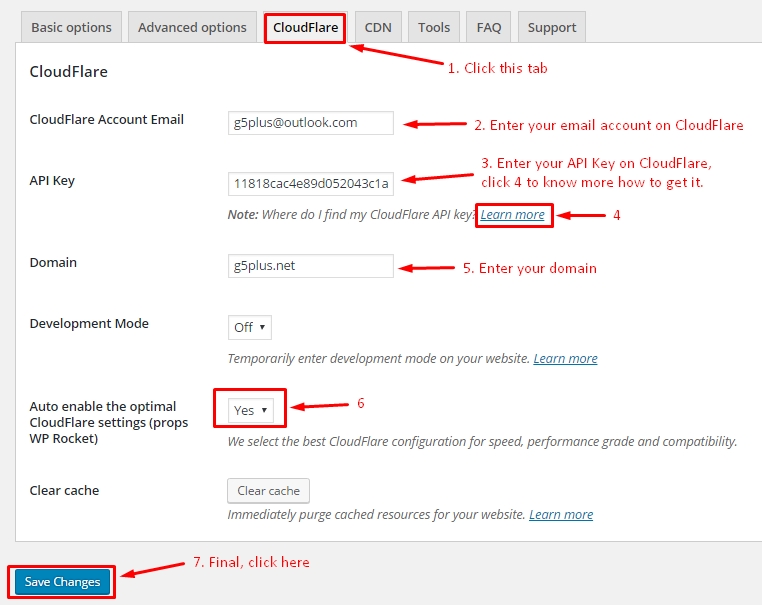
1.3. Config tab “CloudFlare”, if not exist, go to 1.4:
1.4. Config “CDN”
After all step above done, click “Save Changes” button.
2. How to config CloudFlare account:
2.1. Integrated DNS’s your domain to CloudFlare.
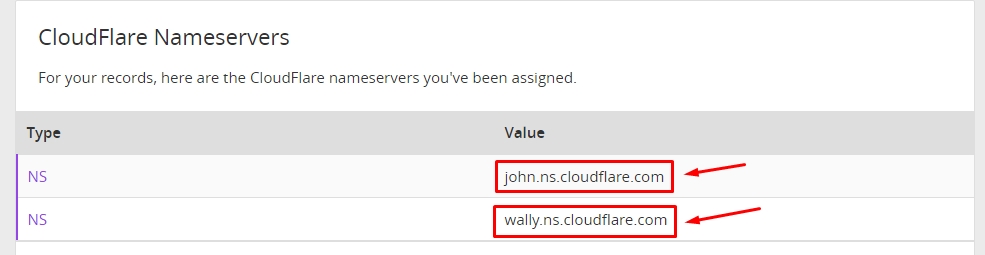
Login to account manager domain then change/point DNS value to DNS Cloudflare’s server. In case you don’t know what to do, please contact domain provider.
With my domain, point to: john.ns.cloudflare.com and wally.ns.cloudflare.com view here:
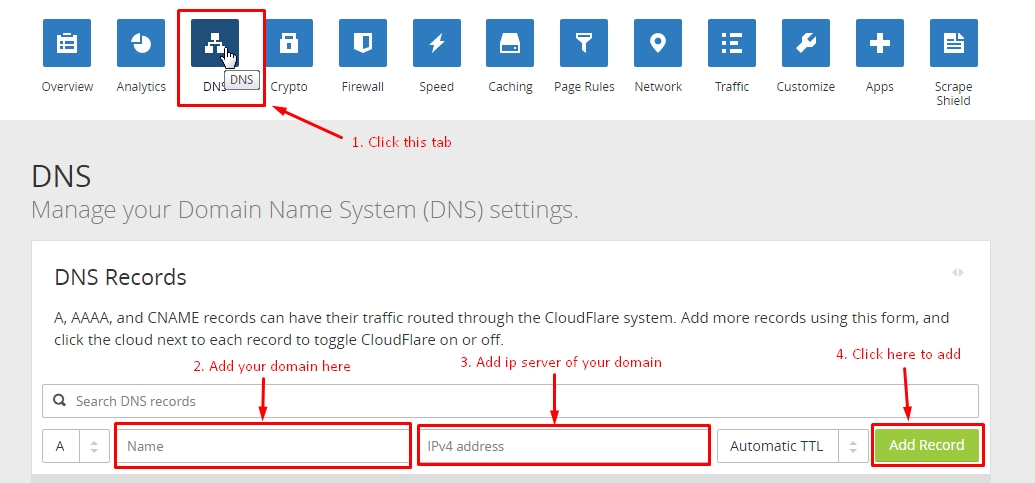
2.2 Add DNS your domain to DNS cloud’s server.
Login to Cloudflare then go to DNS tab
Result as below(example) is ok. In case color of “cloud icon” is grey => not correct, you must click on “cloud icon” to change.
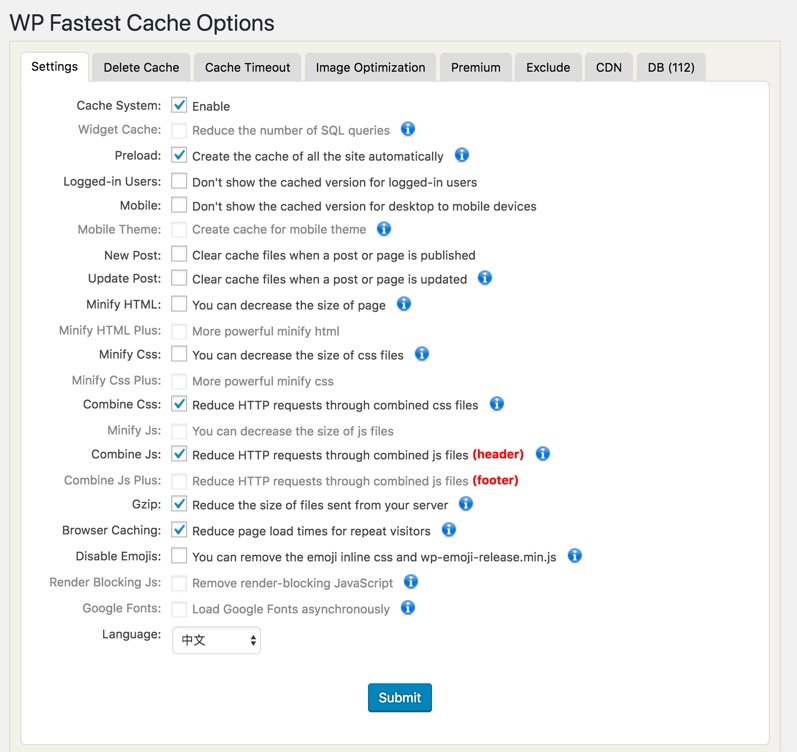
You can buy plugins WP-Rocket or use https://wordpress.org/plugins/w3-total-cache (or another plugin cache) to improve speed. You can also consult the plugin named WP Fastest Cache for website cache. You can install this plugin and also learn how this plugin works, by following the below steps:
Login to your WordPress admin panel
Navigate to Plugins → Add New
Search for WP Fastest Cache, then install and activate the plugin.
Aside from that, here are some more things you can do to better speed up your site:
Image Compress with TinyPNG:
You can compress images from TinyPNG website. Visit https://tinypng.com/ and compress all images before uploading them on your website. By this process, you can decrease your website loading time and provide your visitors, a better experience.
.htaccess Code For Better Website Speed:
Please copy and paste the below code to your .htaccess file (you will find this file on the root folder of your hosting directory) for improved performance of your website.
(Notice: Please don’t replace any code that already exists on the .htaccess file because it may have serious implications on your website)
If you have any troubles configuring your website applications with the above settings you can contact the Support Center by signing up and submit a new topic. G5Theme Support Team will be glad to assist you.
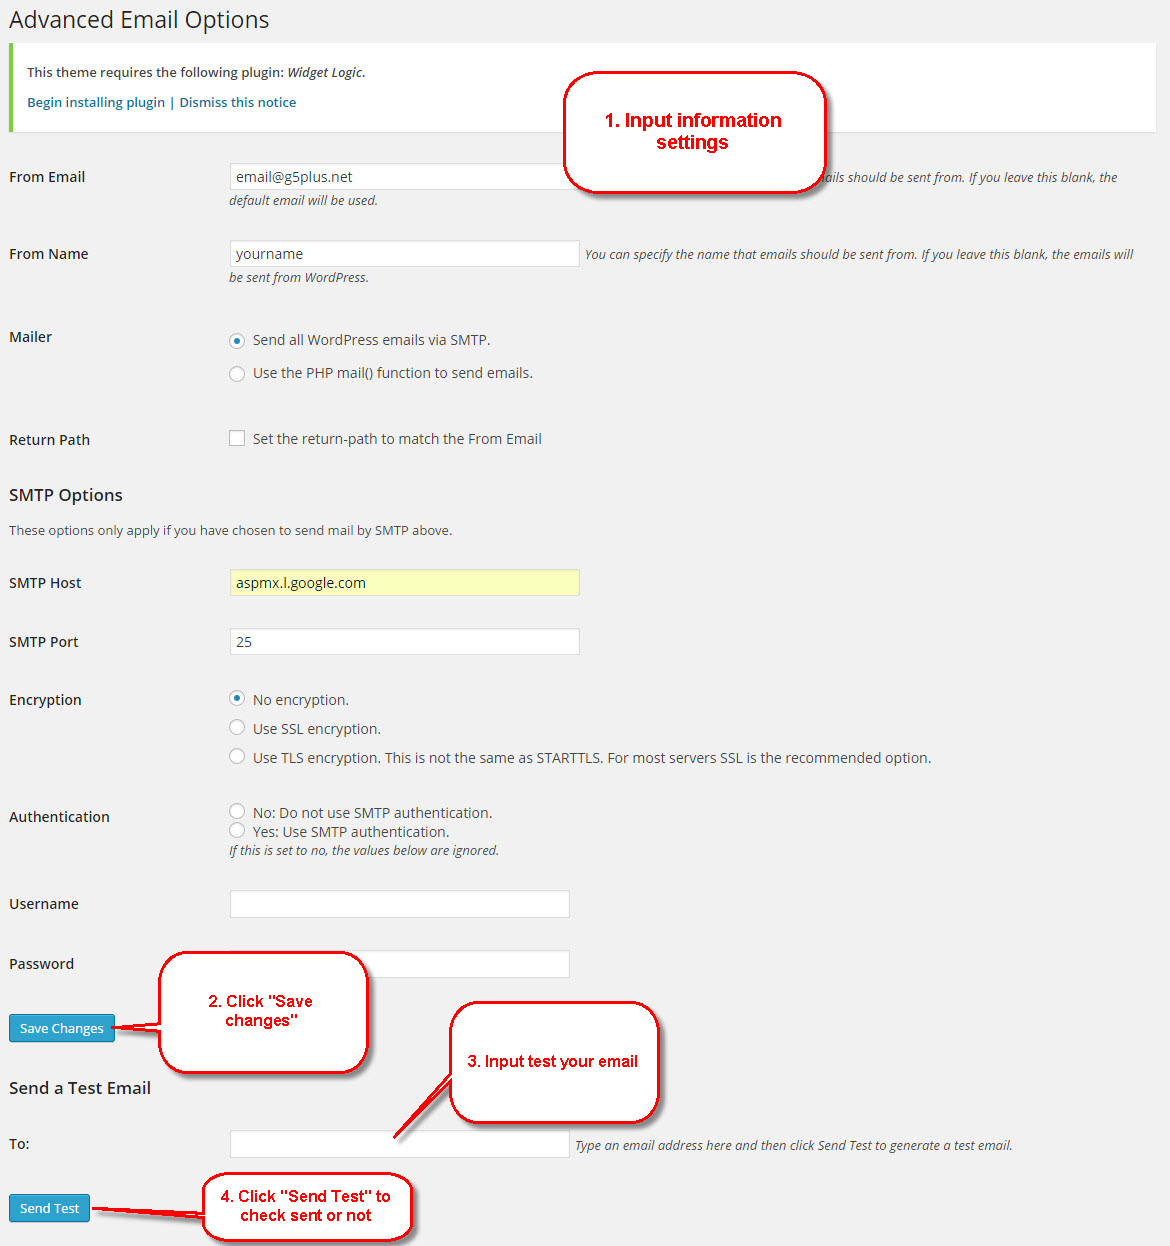
Google’s GMail SMTP server is a free service for anyone who has a GMail account. You can use this free SMTP server to send emails from your website. E-mail sending will take place just the same as a standard e-mail client (Windows Mail, Outlook, Thunderbird).
Gmail automatically rewrites the “from” line of any e-mail you send via their SMTP gateway to your Gmail address, and it overrides any Reply-To settings you may have in your e-mail software in favor of the one in Gmail’s web interface. So while Gmail’s SMTP access sure is handy, it’s not a perfect solution for everybody. Gmail also stores and indexes anything you send via SMTP as if you had sent it using the website, so all your e-mail is still searchable and in one place.
If you don’t have a GMail account, you can create one at the GMail account creation page. Firstly, please install WP SMTP. Then all you need to do is configure your mail client to use GMail for outgoing mail server.
Access to configure Email
The details you should use are:
Outgoing Mail (SMTP) Server: smtp.gmail.com
Port: 465 or 587
Use Secure Connection: Yes (this can be TLS or SSL depending on your mail client)
If you have any troubles configuring your website applications with the above settings you can contact the G5Theme Support team and they will be glad to assist you.
Adding your own choice of fonts is relatively easy by using Custom CSS function on the G5Theme item. All that’s required is uploading a font to your server, then adding it to your theme with a few small snippets of CSS.
Let’s look at how to do it for your WordPress theme as well as a G5Theme item.
Step 1: Prepare all your font files
There are many places to find great web fonts for free, just make sure the font you choose has a license suitable for your needs.
Once you have chosen your new font, you need to download its file. Keep in mind that there are different kinds of font files and they aren’t all compatible across most major browsers (ex: my theme used eot, woff2, woff, ttf, svg)
Step 2: Upload font files to your directory
Once you’ve prepared all your font, it’s a good idea to back up your entire site before making any changes.
Unzip the font packaged file and upload the contents to your theme folder which can be found under this path wp-content\themes\your-theme\assets\fonts (“Fonts” folder to house your file to keep things organized, especially if you plan on adding more than one font)
Step 3: Add Custom CSS
Go to Theme Options >> Custom CSS tab on the backend, add CSS below:
– your_name_font_family: name of the font, you can type anything you want (make sure that it don’t duplicate already fonts)
– your_domain: your website URL
– your_font_file_name: they are the name of files (which you uploaded to directory font).
Step 4: Save changes
Click “Save Changes” and “Generate Less To CSS”
or click “Save & Generate CSS” button. Recently, we integrated “Save Changes” and “Generate Less To CSS” button (http://prntscr.com/gb0920) so you can simply click on “Save Changes” button.
After that, you can use style: font-family: 'your_name_font_family';anywhere on your website.
How to add a new font to Theme Options in Real Estate Themes
These screenshots below are captured in the Benaa theme – one of the real estate WordPress themes developed by G5Theme.
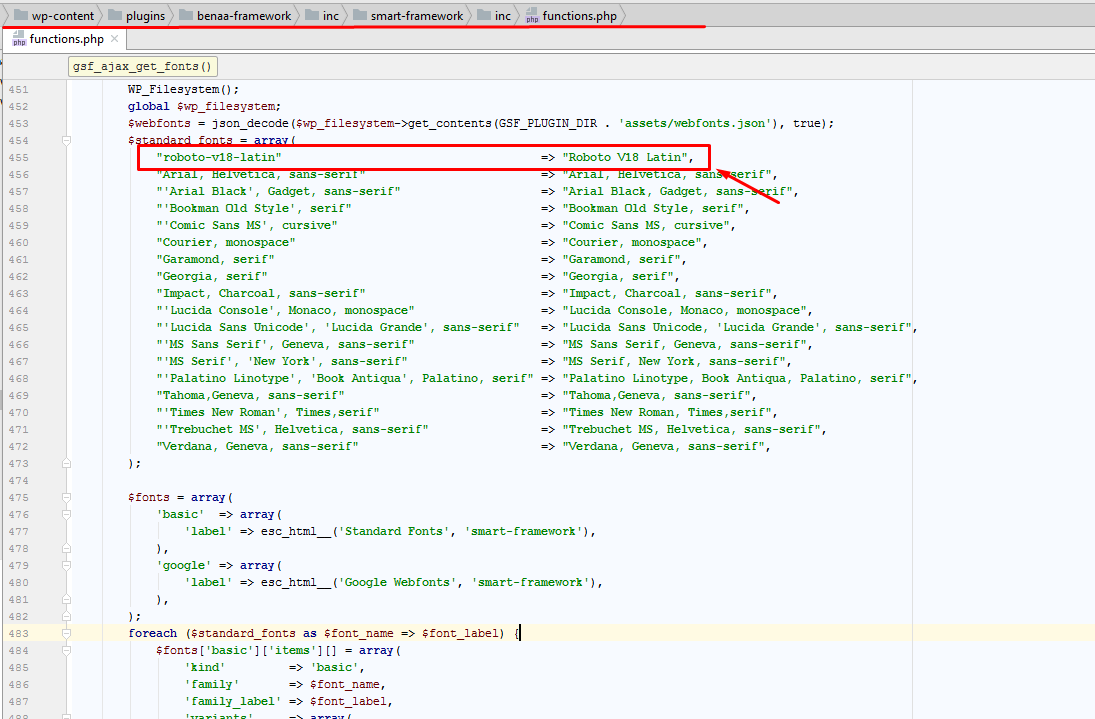
Step 1: Prepare all your font files and declare the new font to the functions.php file
Download the package of the font you have chosen, then log in your FTP account to declare the new font to the functions.php file which located in this path: wp-content/plugins/benaa-framework/inc/smart-framework/inc/funtions.php
Declare the new font to function.php file
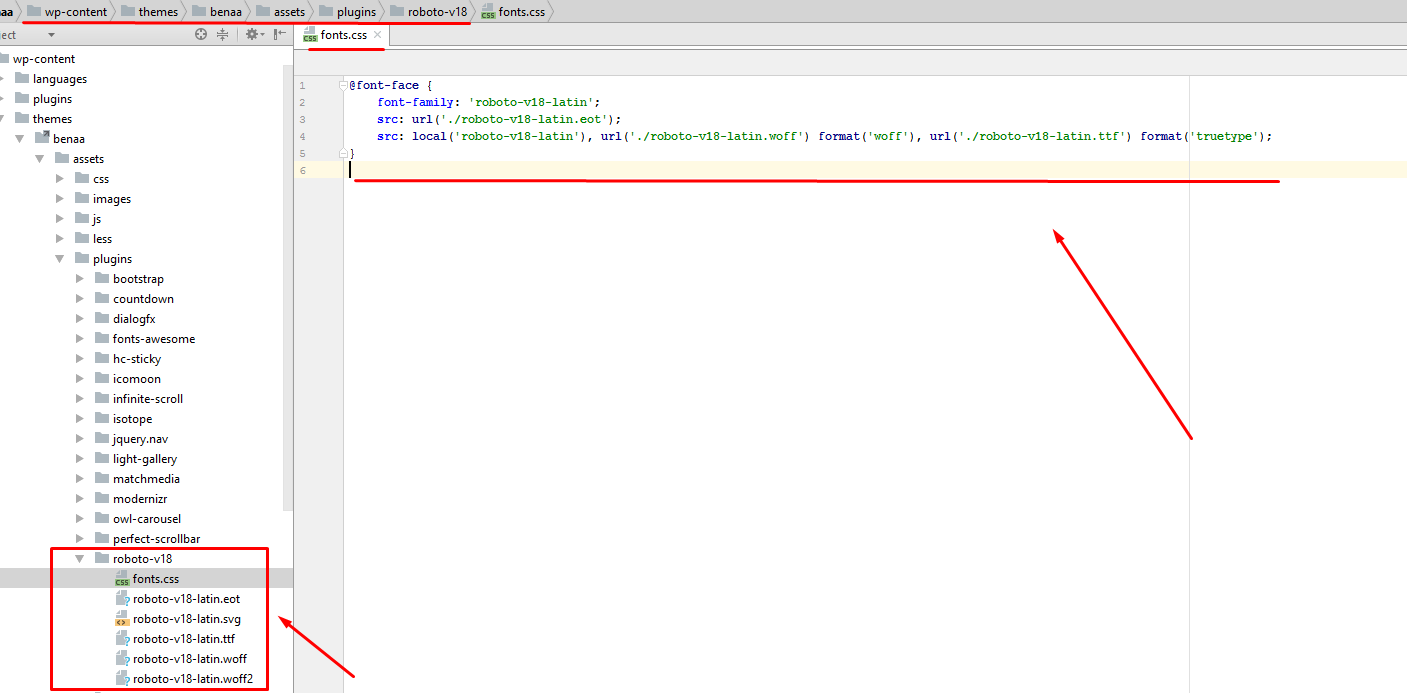
Step 2: Upload all the font files and create a new CSS file for the font
Unzip the font packaged file then go to this path: wp-content/themes/benaa/assets/plugins/ and upload the folder that included all the font files.
Create a new CSS file named fonts.css which declare the font files as below:
Upload all the font files and create the fonts.css file
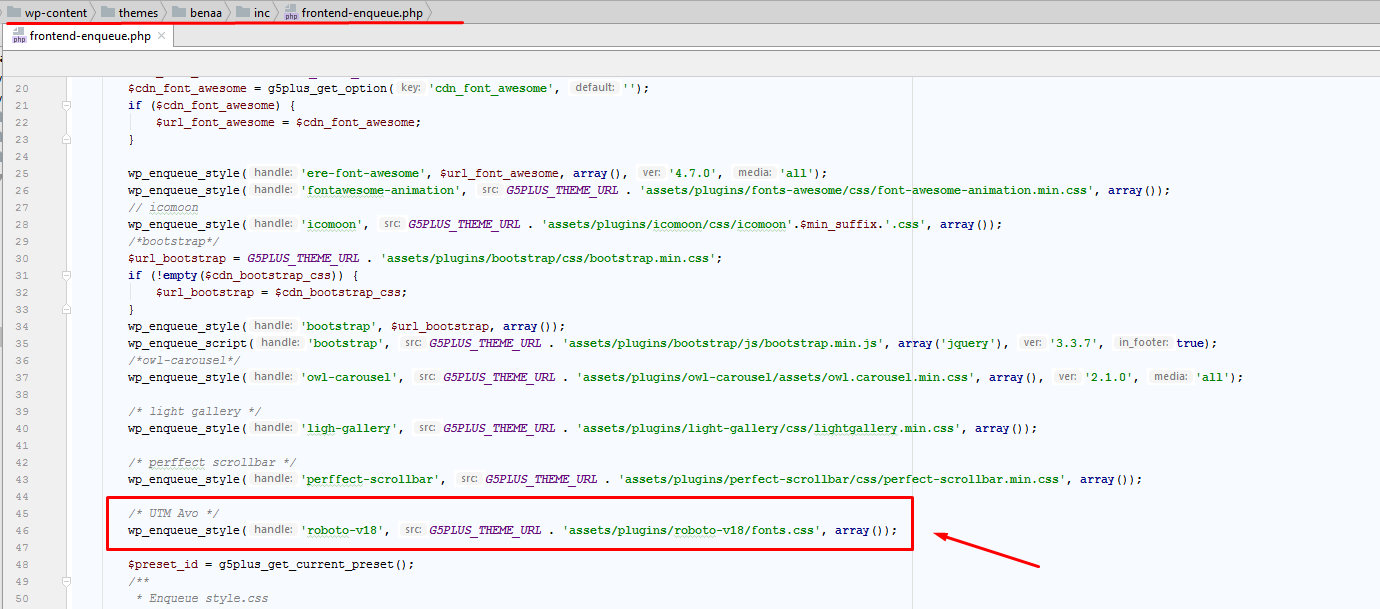
Step 3: Declare the font to the frontend-enqueue.php
Declare the font to the frontend-enqueue.php file which can be found under this path: wp-content/themes/benaa/inc
Declare the font to the frontend-enqueue.php
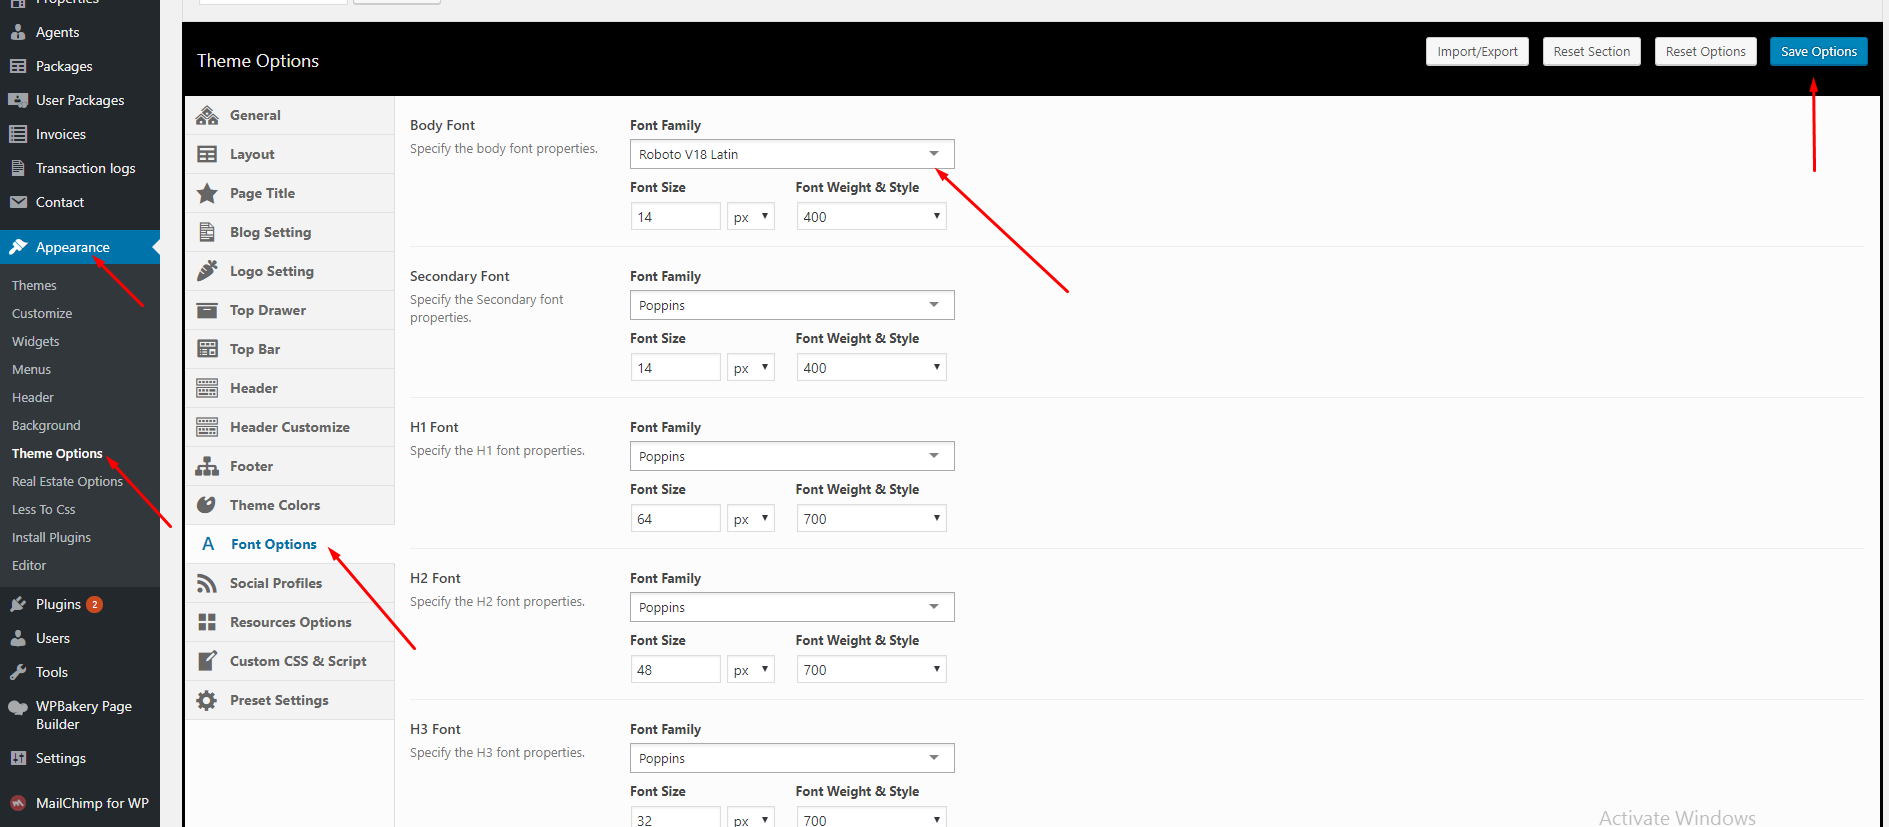
Step 4: Use the new font in Theme Options
Go to Theme Options -> Font Options to choose the new font from Font Family
Theme Options -> Font Options
——————-
If you have any troubles configuring your website applications with the above settings you can contact the G5Plus Support team by signing up and submit a new topic. We will be glad to assist you.
Beside of ordinary menu setup in WordPress, XMENU that have been developed by G5Theme added a lot of options for customizing menus. XMENU is located in per menu item that you can customize them to bring your menus to new level!
This article focuses on show you How to build menu using XMENU. We used Zorka theme for example, but this step by step guide is similar to these theme: DARNA, GROVE, MEGATRON, HANDMADE, ACADEMIA, PITHREE, ORSON, RICA, MOWASALAT, ARVO, MOVECO, ORION, BEYOT so you would be able to refer.
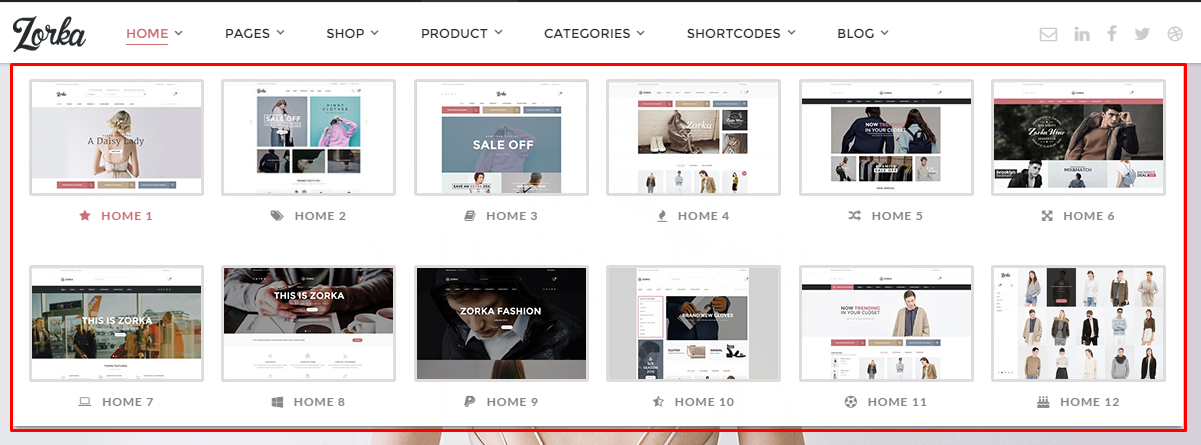
For example we will create a new menu with 2 rows, 6 columns as Zorka Demo Data, it will look like below:
You can follow these step as below:
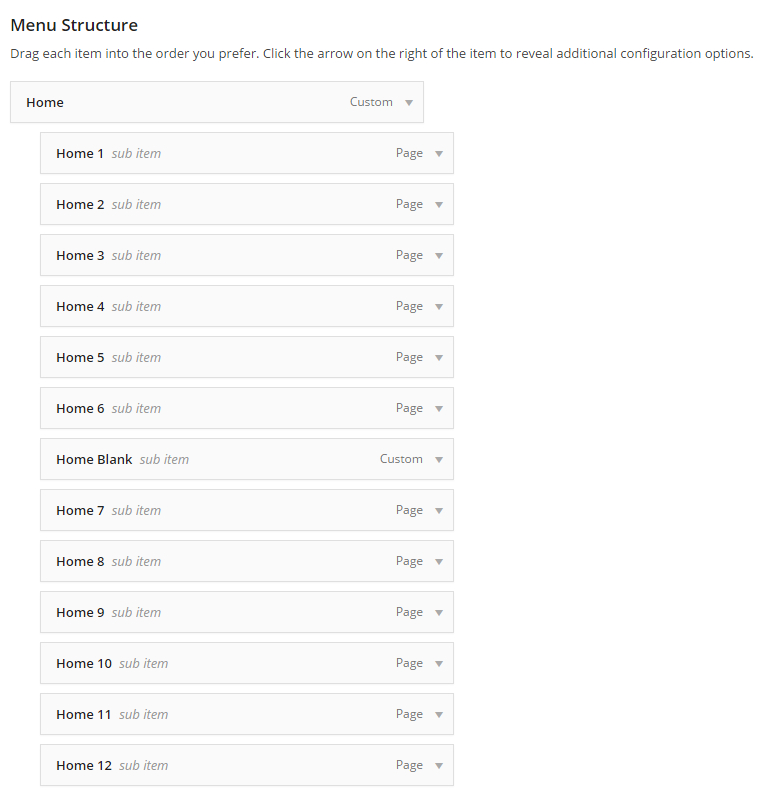
Step 1: Go to Appearance >> Menus. Add 12 menu item from Home 1 to Home 12 and 1 menu item Home Blank to seperate 2 rows as image:
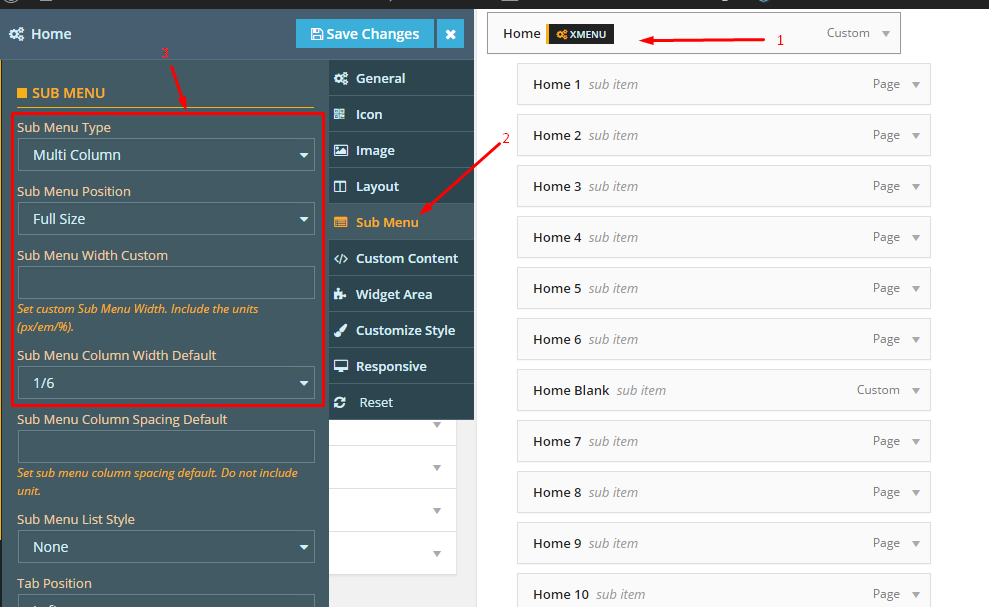
Step 2: Config menu Home on Sub Menu tab:
Step 3:Config for Home 1 – Home 12 as:
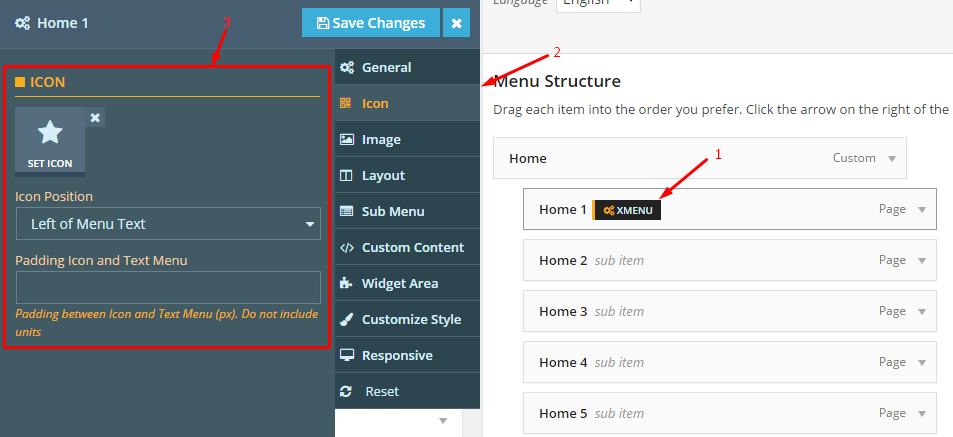
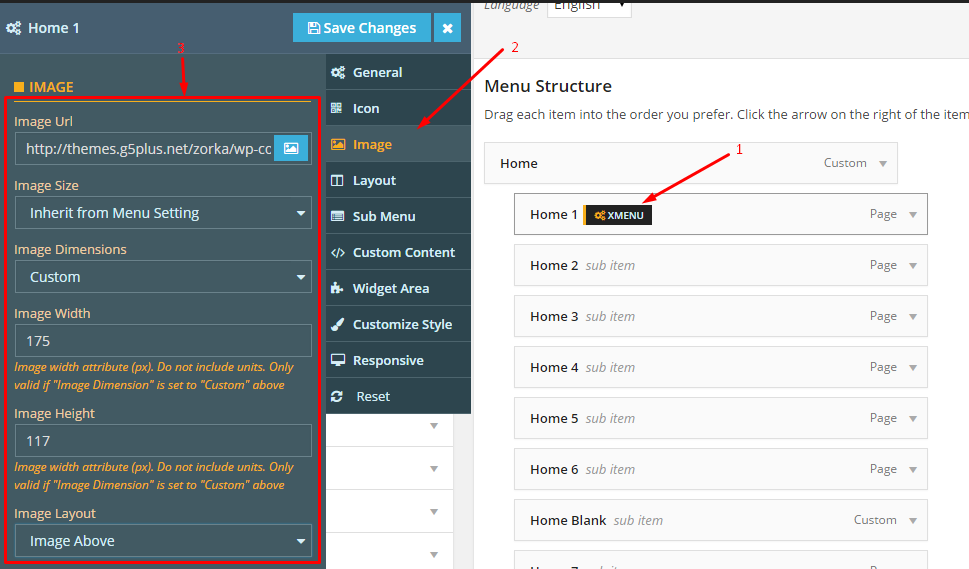
3.1 Config Icon tab:
3.2 Config Image tab:
3.3 Config Layout tab:
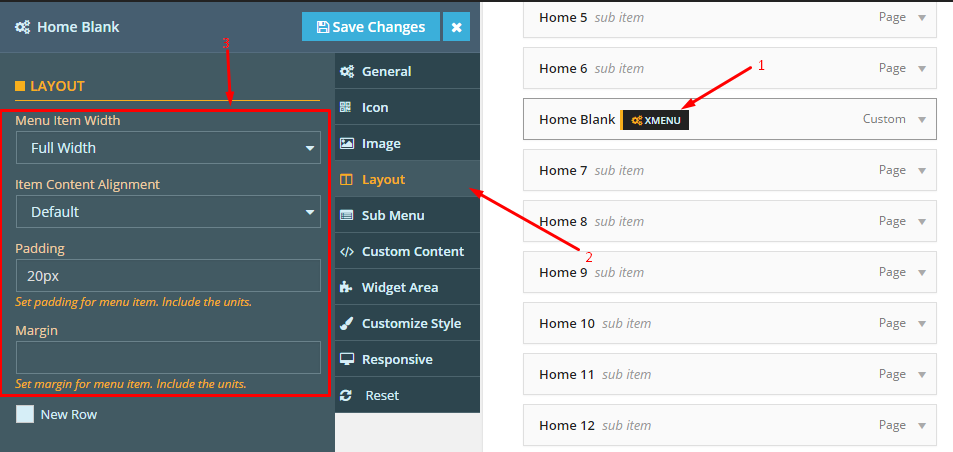
4. Config Home Blank menu on Layout tab:
NOTICE: Recently, in our lastest themes XMENU’s appearance have had some changes as below:
To configure settings for individual menu items or submenus, hover over the menu item you want to configure, and click the XMENU button that appears. The Menu Item Settings Panel will display from left.
These settings control a specific menu item, with options including:
General settings
Submenu (custom width, position, sub menu animation, sub menu transition)
Click the Save Changes button at the top to save settings for this specific item. To configure a Submenu, click on the parent item for that submenu and then click the Submenu tab on the right.
Attribute
Description
General
URL
URL go to when user click this menu item
Navigation Label
Title of menu item
Title Attribute
Title for tag of menu item
CSS Classes
Add advanced custom CSS
Link Relationship (XFN)
Value for attribute rel
Description
Description of the menu item
Menu Featured
Select style for the menu item
Icon
Select icon for the menu item
Sub Menu
Sub Menu Width
Set Sub Menu Width
Sub Menu Position
Select Sub Menu Position
Sub Menu Transition
Select Sub Menu Transition
—————
If you have any troubles configuring your website applications with the above settings you can contact the Support Center by signing up and submit a new topic. G5Theme Support Team will be glad to assist you.
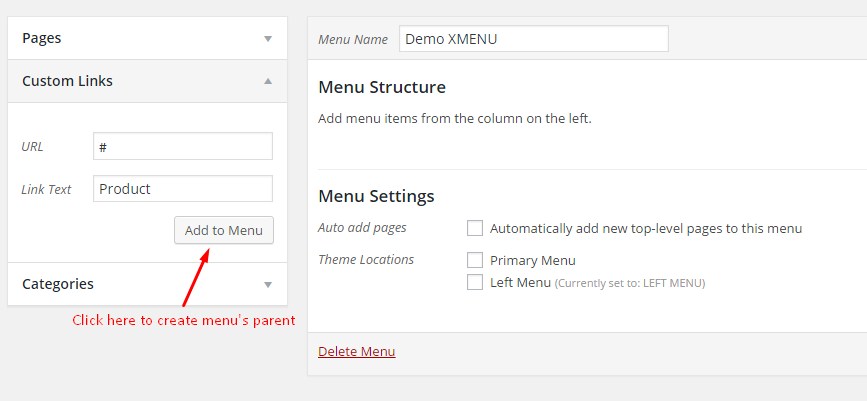
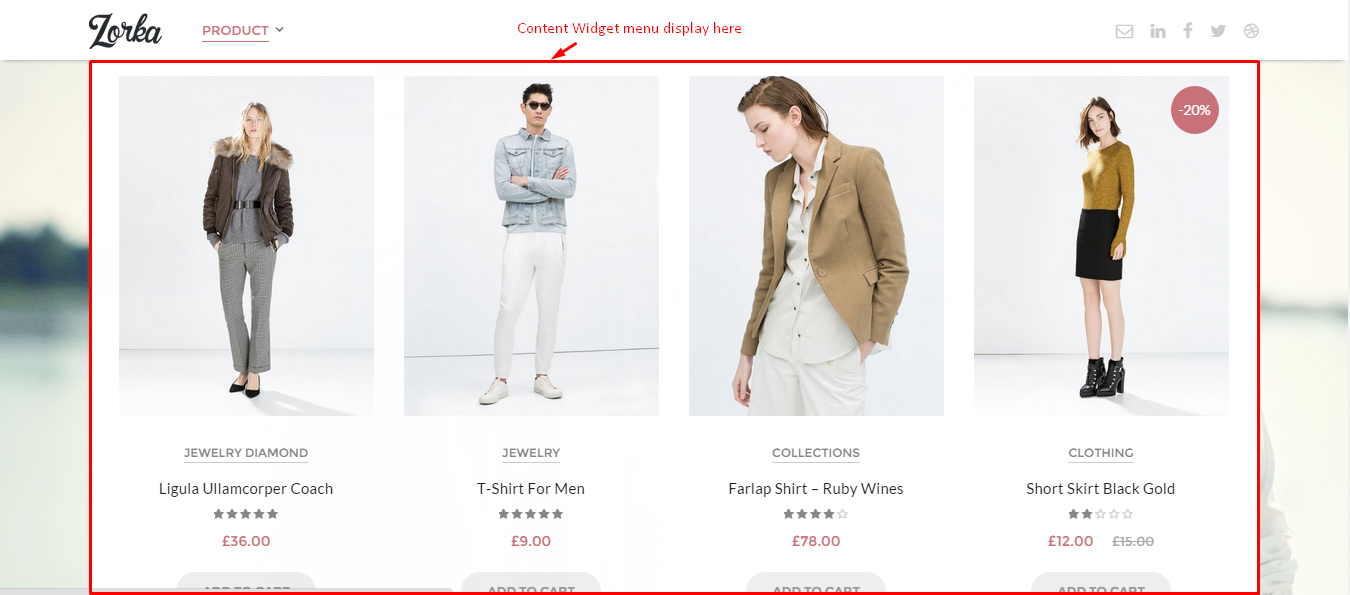
This article will show you How to create mega menu with Widget Area content, please follow our step by step on each images:
Step 1: Create menu parent
And child menu:
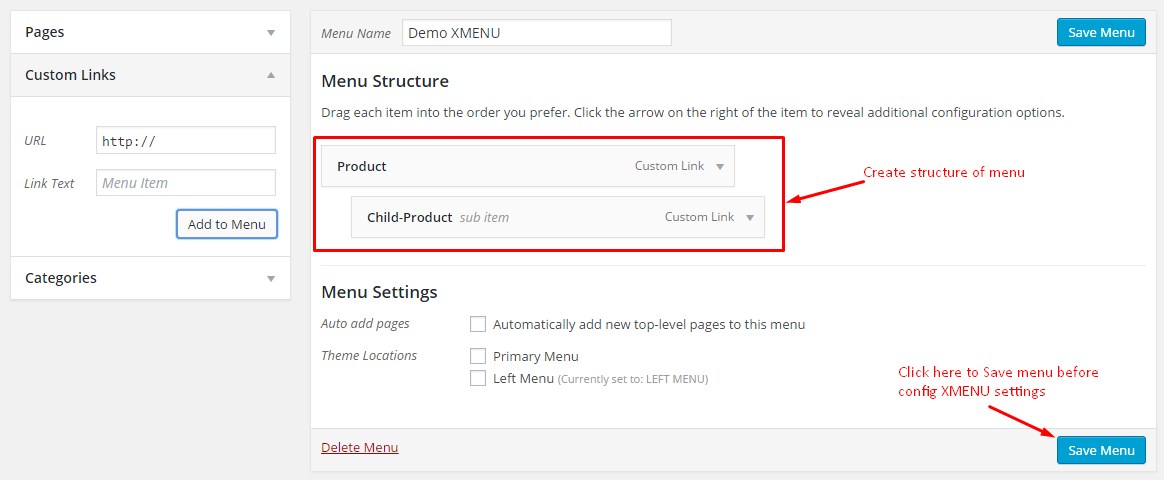
Create structure menu:
Result here:
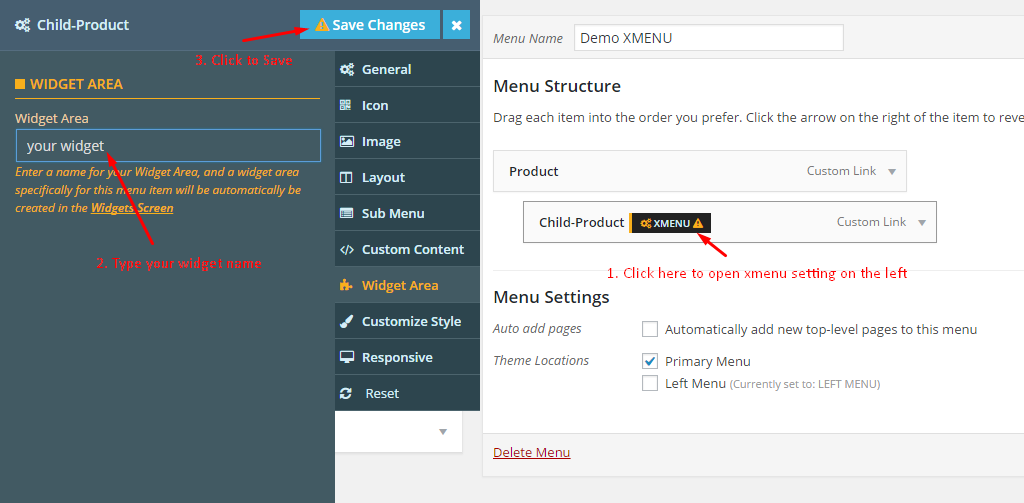
Step 2: Create dynamic widget area for menu
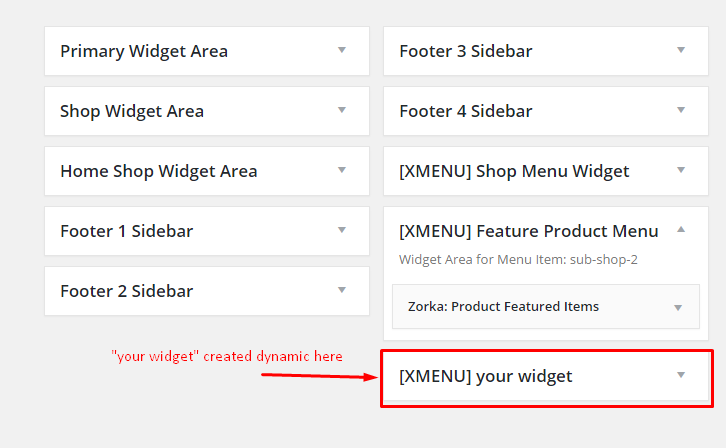
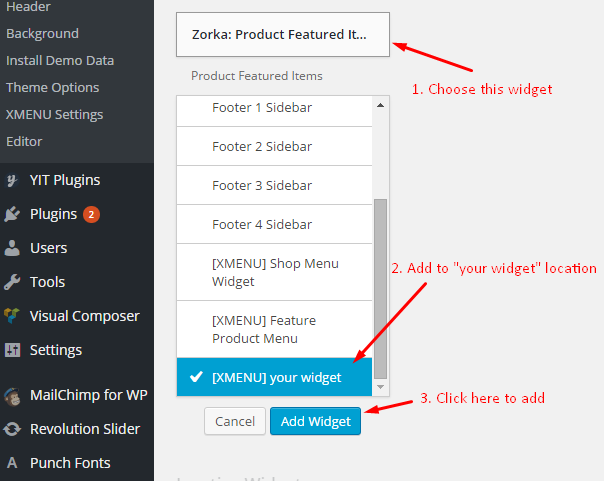
Go to widgets manager:
Result here:
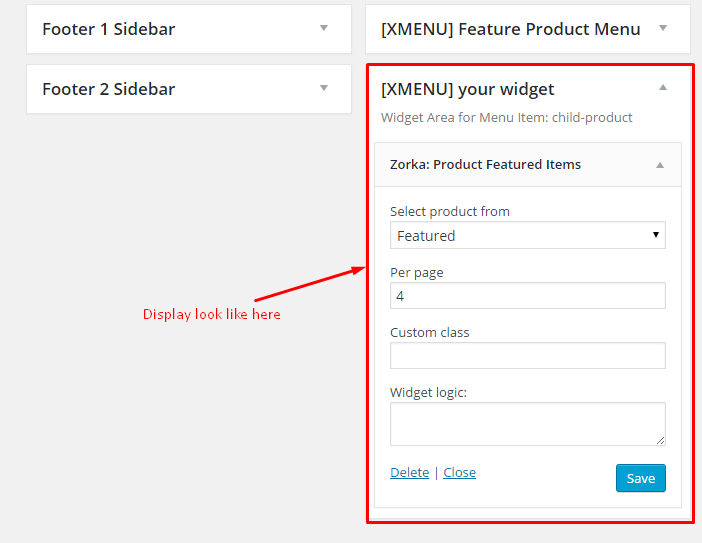
Step 3: Add content to widget area(which created by Step 2)
Setting parameter:
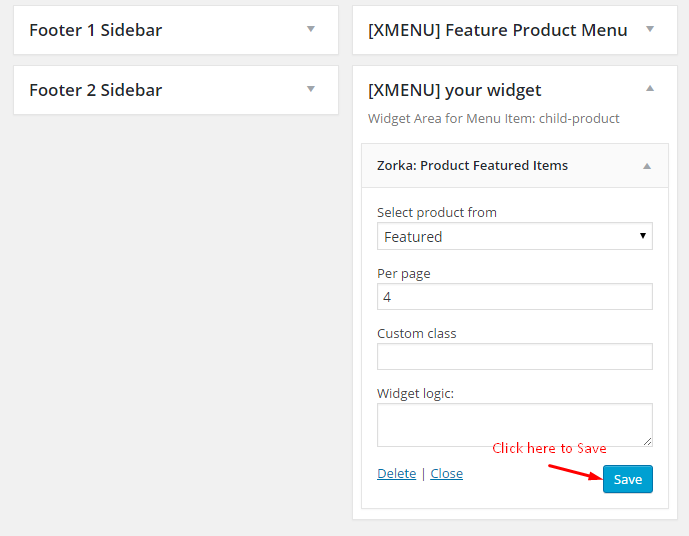
Save data:
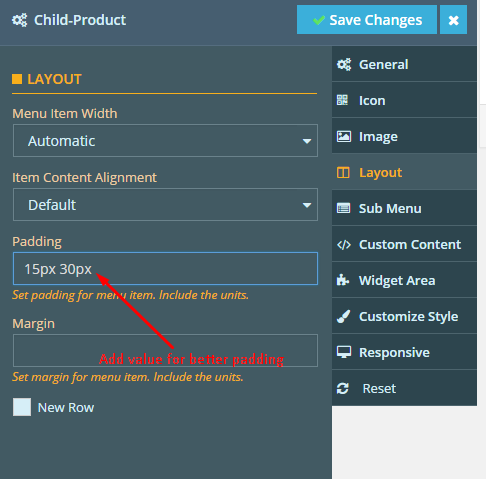
Step 4(addition): Setting other paramater for look the same image screenshot result.
Disable text on menu:
Add padding:
Step 5: Result all here
DONE.
————
If you have any troubles configuring your website applications with the above settings you can contact the Support Center by signing up and submit a new topic. G5Theme Support Team will be glad to assist you.
Thank you very much for choosing G5Theme!
Very few developers develop their plugins and themes in a language different from English so you will have to translate the phrase in theme and plugins into many different languages by yourself, and I’ll explain to you how. There are two ways to do it.
– Directly within WordPress by using a localization plugin (such as Loco Translate plugin – that’s free and most of my customers used successfully). You can also consult our guide on How to Translate using LOCO Translate plugin
– On your PC/Mac, using Poedit. To change the value field of the theme via language file, you can do follow one of 2 methods below.
Method 1.
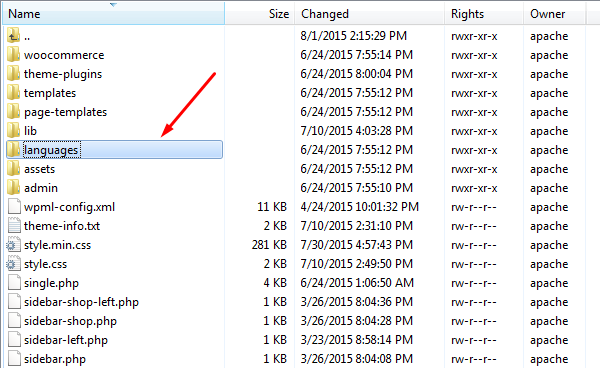
Edit .po/pot file(in directory languages) as the image below(root is my theme):
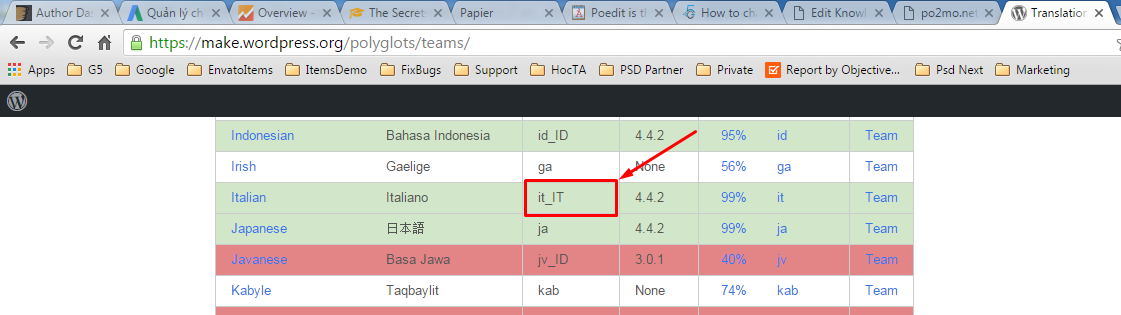
– Rename file corresponding with your Locale here: https://make.wordpress.org/polyglots/teams/ (In this article I will get an example: change en_US.po to it_IT.po). View image:
– Then download & install Gettext Translations Editor software(free) at https://poedit.net/wordpress
– Edit new file(it_IT.po) with software just installed.
– Change/add value as you want, then convert .po to mo file via http://po2mo.net/.
+Open http://po2mo.net/ choose .po file, click ‘Convert‘ button.
+ Then download MO file after convert.
The file downloaded has the name look like: abcdedg_it_IT.mo, change file name downloaded to “your_local.mo” file. Example: changed to it_IT.mo
Method 2.
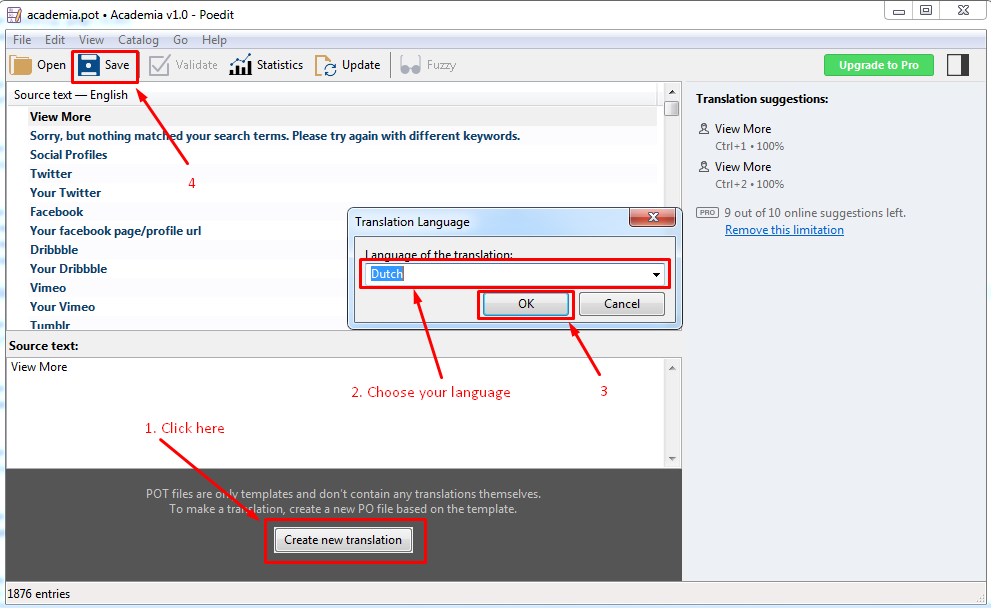
Download and install software Gettext Translations Editor at https://poedit.net/wordpress then open/edit file .po/pot on the path as the image above(method 1).
After changed content/value, click Save:
– If exist po/mo files language as you want => it will override current.
– If not exist, do follow:
After all, you will get file name look like: it_IT.mo
Last step for both mothed:
Copy/upload .mo file up to languages directory(in my theme) on your server.
Note: to active your local language, you must go to Settings >> General menu, do follow:
Sometime, you will want to send FTP access, WordPress Admin access information or any sensitive information. In that case, a private reply is pretty helpful to send a topic reply privately, only topic creator and G5Theme’s staff can read that reply.
To do so, please find out the “Set as private reply” checkbox over Topic Reply Form and make sure it has been checked.
 That’s all. Thanks for your watching.
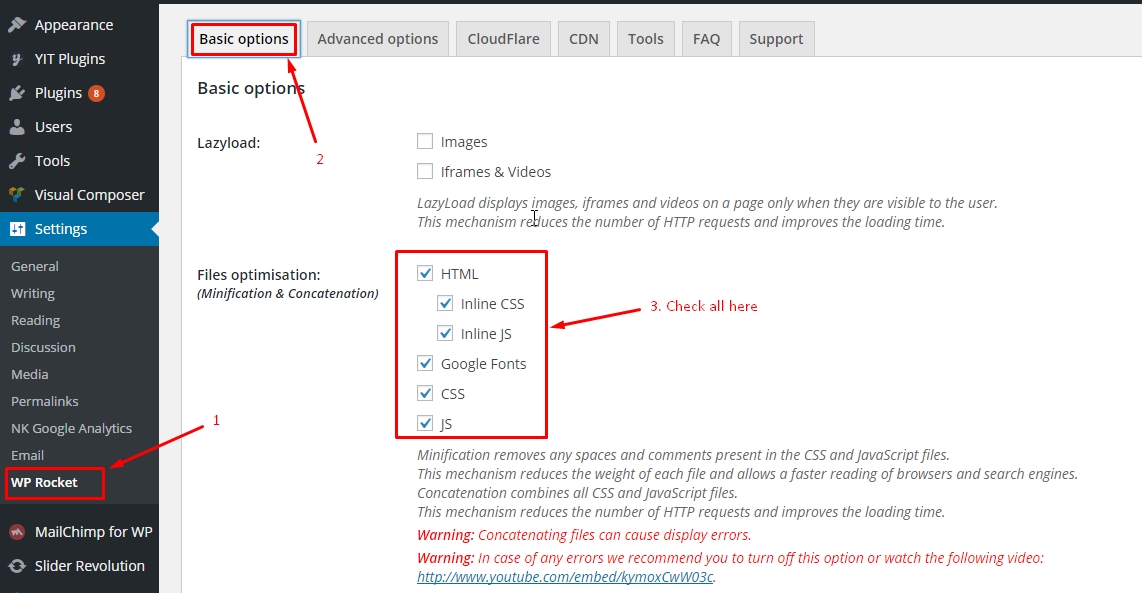


